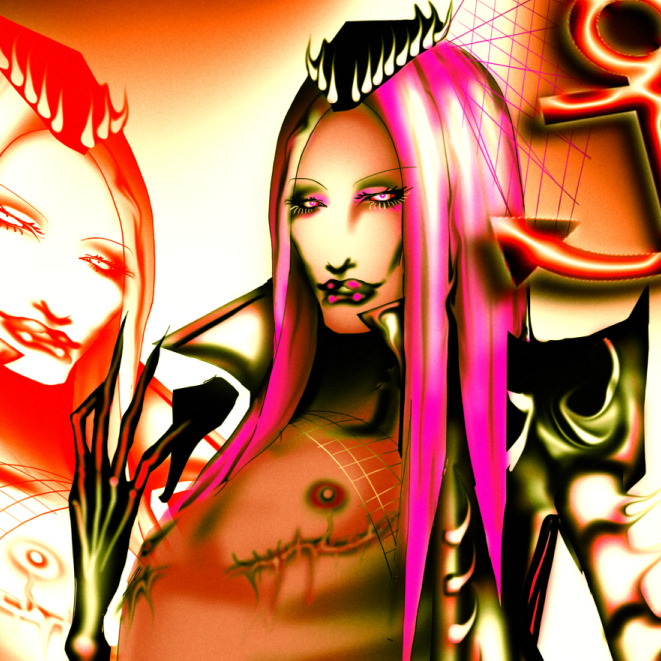
Here's a small tutorial going through my exact process of drawing scars digitally, specifically top surgery scars and in a horror kind of style. I'm using Paint Tool SAIv2, but you can definitely apply this technique to any other drawing software. The tools might be named differently or you'll have to create your own brushes but it's possible for sure!
This is not the only way, or the "proper" way to draw scars, this is just my personal style and my interpretation of what represents me and my scars. You don't have to feel this way about your own, neither do you have to draw them like this! :)
THE LINEART
Step 1:
The Base


You'll want to start with a simple but harsh black line with the airbrush. You can tidy it up a little bit if you want, but it's not neccessary. Make sure that the line is following the flow and perspective of the body, so it doesn't look awkwardly placed on top of the body. You want it to look like a part of the body, so it will change perspectives alongside how the body moves. Using a TRANSPARENT (not white!!!!) airbrush, create a line that goes through the middle of the black line, this will be the "base" of the scar.
Step 2:
The Stitches


From the base of the scar, create some lines protruding from the top and bottom of the scar, kind of like stitches. (Well actually, these lines do represent the healed stitches! They've just become fleshy as they healed). Add as many as you want, whatever feels right or looks good to you. Connect these new black lines with the transparent line of the base scar using the transparent airbrush again, make sure they're touching. You want the black to act as a shadow, and the "white" to act like flesh that protrudes slightly from the body.
Step 3:
Distorting.


With the smudge tool (or any similar tool, basically anything that will "push" the lineart around, without blending it in), push out the "stitches" to distort them slightly. Stitches will never quite heal perfectly straight in real life, so it's normal (and fun!) to distort them and let them all look different.
Step 4:
Finishing Touches


With the same airbrush set to transparency, blend out the stitches by removing the "points" on the spikes you just made. Feel free to repeat the last few steps until you get a scar you're happy with. You are now done with the lineart!
Some notes about the lineart:
- I try and make the skin somehow look "tight" where the stitches are, like they're being pulled together. You can achieve this by adding more smaller stitches between the larger ones. (Shown in the right-side image in step 4!)
- If you don't have your own body as reference, I reccomend looking at reference images online. If you're aiming for a stylised kind of realism, scars don't have to be straight lines, they can be wobbly and have different varying thickness in different places depending on how tissue has healed. Skin flaps are also possible. It's up to you to experiment as much as you like. You could also make them fun patterns and shapes if you're not aiming for realism! For top surgery scars specifically, they can be longer and go under the arms, and can also have circular scars on the ends of both/one of the sides where drains were removed. All optional and depends!
THE COLOUR:
Step 1:
Base Colours


As a personal stylistic choice, I always duplicate the lineart, then place the duplicate under the original lineart and then change the colour to anything other than black. This time I chose green, as I love the gross undertone it adds to the lineart and the colouring as a whole, but you can change this to fit whatever mood you want, or skip this part entirely.
In the scar lineart, I add red. I use bright red mainly on light skin only, if you are colouring dark skin I recommend darkening this red colour darker than the skin tone. Red is just a personal stylistic choice, so feel free to colour your scars in whatever colour you want when you do this step!
Step 2:
Make 'em shine!


The most fun part for me is always the highlights. Add a bit of white (or light pink or brighter red, depending on what tone of colour you picked) using a smaller airbrush size, and add highlights where you think they look good, or following a light source. Finish it off by locking the top lineart and add some red/any colour to the thick black lineart where the scars are to make them glow. I like using the red because it just makes the scars look extra raw and extra itchy, which is what I'm going for.
END


This is basically it! You're done! :D On the right side is an example of basically the exact same technique, just on a darker skin tone.
As always, feel free to let me know if you follow the tutorial! I'd love to know if it helped or if there's anything you feel I didn't explain quite right. I'll add it here!
